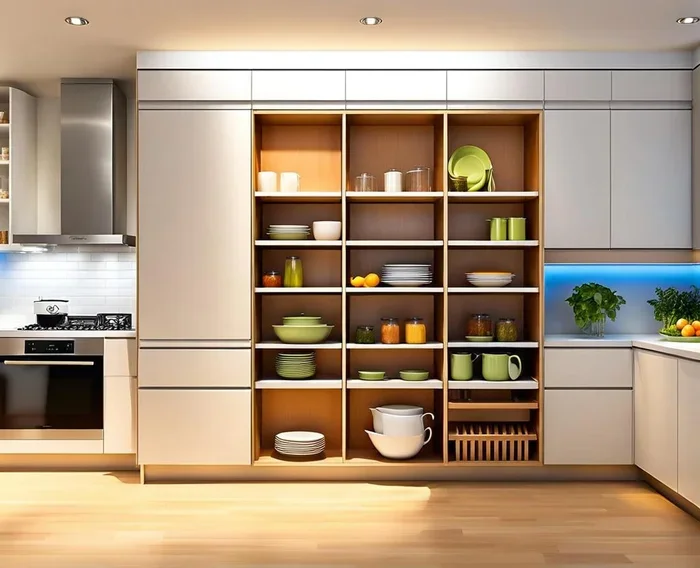
Adding extra shelves to kitchen cabinets is a simple, affordable DIY project that instantly doubles your storage space. This guide covers everything from measuring and planning to installing adjustable shelves, wire inserts, and tension rod options. You will learn step-by-step instructions, expert tips, and common mistakes to avoid for a professional-looking result.
Adding extra shelves to kitchen cabinets is one of the simplest and most effective upgrades you can make. Whether your kitchen feels cramped or your storage is overflowing, new shelves solve the problem fast. You do not need expensive tools or professional help to get this done right.
This guide walks you through every step of the process. From measuring your cabinets to placing the final shelf, we cover it all. You will learn the best methods, the right materials, and common mistakes to avoid. By the time you finish, your kitchen will feel more organized and spacious than ever before.
The entire project takes less than an hour per cabinet. It costs just a few dollars in supplies. Most importantly, it instantly doubles your storage capacity. Let us dive into how to add extra shelves to kitchen cabinets the right way.
The steps in this guide work for all cabinet types. Whether you have base cabinets, wall cabinets, or tall pantry units, the principles remain the same. You just need a little time and patience.
Key Takeaways
- Easy DIY Project: Adding extra shelves to kitchen cabinets requires only basic tools and under an hour per cabinet.
- Multiple Shelf Types: Choose from adjustable pin shelves, fixed bracket shelves, wire inserts, or tension rod shelves based on your needs.
- Proper Measurement is Key: Always measure at three points and use a level to ensure perfectly even shelves.
- Avoid Common Mistakes: Skip overloading thin shelves, forgetting pilot holes, and ignoring cabinet depth for the best results.
- Maximize Space with Accessories: Use shelf risers, dividers, pull-out baskets, and grip liners to get the most from your new shelves.
- Works for All Cabinet Types: The methods apply to base cabinets, wall cabinets, tall pantry units, and corner cabinets alike.
📑 Table of Contents
- Why Adding Extra Shelves to Kitchen Cabinets Is a Smart Move
- Tools and Materials You Need for the Job
- Step-by-Step Guide to Add Extra Shelves to Kitchen Cabinets
- Types of Shelves You Can Install in Kitchen Cabinets
- Common Mistakes to Avoid When Adding Shelves
- Expert Tips to Maximize Your Kitchen Cabinet Space
- Conclusion
Why Adding Extra Shelves to Kitchen Cabinets Is a Smart Move
Most kitchens run out of shelf space faster than people expect. Plates stack up, jars fill the counters, and cabinets feel completely packed. Adding extra shelves to kitchen cabinets gives you the room you need without spending thousands on a renovation.
The beauty of this project is its simplicity. You do not need to buy new cabinets or replace old ones. A few shelf pins, some boards, and about thirty minutes of your time is all it takes. The results are immediate and satisfying.
Here are the main reasons why homeowners love this upgrade:
- Double your storage without spending a fortune
- Customize shelf height for every item you own
- Keep countertops clear and reduce clutter
- Easy to adjust whenever your needs change
- Boost kitchen organization with minimal effort
Extra shelves also make your kitchen more functional. You can store items that normally sit on counters or in drawers. This frees up space for food prep and cooking. Over time, the added organization saves you stress and time every single day.
Think about how often you dig through crowded cabinets. With properly spaced shelves, everything becomes visible and accessible. You will wonder why you did not do this sooner.
Tools and Materials You Need for the Job
Before you start building, gather everything you need. Having all your tools and materials ready prevents delays. This section lists exactly what you will need for a successful project.
Essential tools for adding shelves:
- Tape measure for accurate measurements
- Bubble level to keep shelves even
- Pencil for marking positions
- Drill with appropriate drill bits
- Screwdriver for tightening screws
- Stud finder if mounting into wall cabinets
- Saw for cutting shelf boards
- Sandpaper for smoothing edges
Materials required for the project:
- Shelf pins or adjustable shelf supports
- Shelf boards made from plywood, MDF, or solid wood
- Shelf brackets for fixed installations
- Shelf liner to protect surfaces
- Screws or nails for bracket mounting
- Wood shims for leveling if needed
You can find all these items at any local hardware store or home center. Shelf pins are the most affordable and versatile option. They cost just a few dollars for a pack and work in almost any cabinet. If you prefer a permanent setup, shelf brackets provide stronger support.
Quick Tip: Choose shelf boards that are at least 1/2 inch thick. For cabinets wider than 24 inches, go with 3/4 inch thick material. This prevents sagging and adds durability to your new shelves.
When selecting shelf liner, look for options with a rubber or vinyl backing. These grips prevent items from sliding and protect your shelves from moisture damage. They are a small addition that makes a big difference in daily use.
Step-by-Step Guide to Add Extra Shelves to Kitchen Cabinets
Now we get to the core of the project. Follow these steps carefully, and you will have beautiful new shelves in under an hour. This guide works for most standard kitchen cabinets found in homes today.
Step 1: Empty the Cabinet and Take Measurements
Start by removing everything from the cabinet you want to modify. Take out all dishes, glasses, jars, and containers. Set them aside on a clean surface. This gives you full access to the inside of the cabinet.
Next, grab your tape measure and check the interior dimensions. Measure the width from left to right. Measure the depth from the back wall to the front edge. Measure the height from the bottom to the top of the cabinet.
Important: Take measurements at three different points. Cabinets are rarely perfectly square. Measure at the top, middle, and bottom. Use the smallest measurement for your shelf cuts. This ensures a proper fit every time.
Write down all your measurements on a piece of paper. Bring this paper with you to the store when you buy your shelf materials. Accurate measurements prevent wasted trips and wasted materials.
Step 2: Plan Your Shelf Positions and Heights
Before you drill any holes, plan where each shelf will go. Think about what you will store on each level. Plates and bowls need different heights than spice jars or cereal boxes.
Use your pencil to mark the desired shelf positions on the inside walls of the cabinet. Hold your level against the wall and draw a straight line at each position. This line guides where you will place the shelf pins.
For most base cabinets, spacing shelves about 12 to 15 inches apart works well. This accommodates most dinner plates and everyday dishes. For tall cabinets, spacing shelves 10 to 14 inches apart gives you flexibility.
Quick Tip: Place your bottom shelf at least 4 inches above the cabinet floor. This extra clearance makes cleaning easier and prevents dust buildup on stored items. It also allows you to slide a dust pan or broom underneath if needed.
Consider how you use each cabinet. Store items you use daily on shelves at eye level. Place heavier items on lower shelves where they are easier to reach. Keep rarely used items on the top shelves.
Step 3: Install Shelf Pins or Support Brackets
Shelf pins are small metal pegs that hold your shelves securely in place. They are the most popular choice for adding extra shelves to kitchen cabinets because they are simple and flexible. You can adjust the height anytime by moving the pins to different holes.
Start by holding a shelf pin against the cabinet wall at your marked position. Use your drill to make a small pilot hole. This prevents the wood from splitting. Then screw the pin in gently until it is snug. Do not overtighten.
Repeat this process for every pin position. You typically need two pins on each side wall for every shelf. For wider cabinets over 30 inches, add a third pin in the center. This extra support prevents the shelf from sagging under heavy items.
If you are using shelf brackets instead, position each bracket at your marked lines. Pre-drill the screw holes and attach the brackets securely. Make sure each bracket is level before tightening the screws completely.
Common Mistake: Do not place shelf pins too close to the cabinet edges. This weakens the hold and can cause the shelf to tilt or collapse. Leave at least 2 inches of clearance from each edge for the best results.
Expert Insight: If your cabinet walls are thin, consider using shelf pin anchors. These small inserts provide a stronger grip in softwood or particleboard cabinets. They make a noticeable difference in shelf stability.
Step 4: Cut Your Shelf Boards to Size
Now it is time to cut your shelf boards to match your measurements. Use the dimensions you recorded in Step 1. A snug fit ensures your shelves look professional and stay secure.
If you are working with plywood or MDF, a circular saw gives you clean, straight cuts. For thinner boards or smaller projects, a hand saw works just as well. A table saw offers the most precision if you have access to one.
After cutting, use sandpaper to smooth all the edges. This prevents splinters and gives the shelves a polished look. Pay special attention to the corners and any cut ends.
Place each shelf board on top of the pins or brackets. Press down gently to ensure it sits flat and even. Use your level to check that the shelf is horizontal. If it wobbles, adjust the pins or add thin shims underneath to level it out.
Quick Tip: If your shelf feels loose on the pins, add a small piece of felt or rubber pad on top of each pin. This creates friction that holds the shelf more securely. It also reduces the rattling noise that shelves can make when you open and close cabinet doors.
Step 5: Add Shelf Liners and Organize Your Items
Once your shelves are installed and level, add shelf liners. These thin protective layers serve multiple purposes. They protect the wood from scratches, spills, and moisture damage. They also make cleaning up after spills much easier.
Cut the liner to fit each shelf precisely. Press it down flat, smoothing out any air bubbles. Adhesive-backed liners stick in place without any additional effort. Non-adhesive liners work just as well if you tuck them snugly into place.
Now it is time to put your items back in the cabinet. Group similar items together for easy access. Plates go on one shelf, bowls on another, and mugs on a third. This organization system saves you time every time you open the cabinet.
Expert Tip: Use small bins or baskets for loose items like snacks, tea bags, or spice packets. They keep things tidy and prevent small items from getting lost behind larger ones. Clear containers are especially helpful because you can see the contents at a glance.
Common Mistake: Do not skip shelf dividers. They keep items from sliding around and help you maximize every inch of shelf space. Adjustable dividers are inexpensive and work with any shelf type.
Types of Shelves You Can Install in Kitchen Cabinets
Not all shelf installations are the same. Different methods work better for different storage needs. Understanding your options helps you choose the best approach for each cabinet in your kitchen.
Fixed Shelves with Brackets
Fixed shelves attach directly to the cabinet walls using brackets or screws. Once installed, they do not move. This method provides the strongest support for heavy items.
Advantages of fixed shelves:
- Extremely sturdy and capable of holding heavy loads
- No visible pins or hardware on the shelf surface
- Ideal for storing pots, pans, and heavy cookware
- Provides a solid, stable platform for all items
Disadvantages of fixed shelves:
- Cannot be adjusted once installed
- Requires more time and effort to install
- Holes in cabinet walls are permanent
Fixed shelves work best in cabinets where you store heavy or bulky items. They are perfect for base cabinets that hold your heaviest pots and pans. The solid support of brackets means you never have to worry about sagging or collapsing.
When installing fixed shelves, make sure to use screws that are long enough to grip the cabinet sides securely. Short screws can loosen over time, especially with heavy items on the shelf.
Adjustable Shelves with Shelf Pins
Adjustable shelves use shelf pins inserted into the cabinet walls. The shelf boards rest on top of these pins. This is the most popular and versatile method for adding extra shelves to kitchen cabinets. The best part is that you can change the shelf height whenever you need to.
Advantages of adjustable shelves:
- Flexible height adjustments for different items
- Quick and easy to install
- No permanent changes to your cabinets
- Inexpensive and widely available
Disadvantages of adjustable shelves:
- Pins may stick out slightly on the shelf surface
- Thin shelves may sag under heavy loads
- Pins can sometimes be difficult to remove if stuck
Adjustable shelves are perfect for everyday kitchen storage. They work wonderfully for plates, glasses, mugs, and standard dishware. The ability to move shelves up or down means you can adapt to new items you buy over time.
Quick Tip: Use shelf pin inserts for thin cabinet walls. These small metal sleeves strengthen the hold and prevent the pins from pulling out. They are a cheap addition that significantly improves shelf stability.
Wire Shelf Inserts
Wire shelf inserts are metal grid shelves that slide into existing cabinets. They are lightweight, easy to install, and allow air to circulate around stored items. Many homeowners use them in pantry cabinets and tall storage units.
Advantages of wire shelves:
- Very lightweight and easy to handle
- Allow air circulation to prevent moisture buildup
- Simple to clean with a quick wipe
- Available in standard sizes for most cabinets
Disadvantages of wire shelves:
- Not as sturdy as solid wood or plywood shelves
- May rust over time in humid environments
- Can be noisy when items are placed on them
Wire shelves work best for lightweight items like dry goods, paper products, and plastic containers. They are a great choice for pantry cabinets where you store canned goods and boxed items. The open wire design makes it easy to see everything at a glance.
Some wire shelf systems come with clips that attach to the cabinet walls. These provide extra stability and prevent the shelves from sliding side to side. Look for these when shopping for wire shelf inserts.
Tension Rod Shelves for No-Drill Installation
Tension rod shelves are a clever no-tools option. A tension rod presses against the inside walls of the cabinet using spring pressure. A board rests on top of the rod, creating a functional shelf without any drilling or screws.
Advantages of tension rod shelves:
- No tools or drilling required whatsoever
- Completely removable and portable
- Perfect for renters who cannot modify cabinets
- Quick to install in under five minutes
Disadvantages of tension rod shelves:
- Less stable than pin or bracket systems
- Limited weight capacity compared to other methods
- May shift if the cabinet walls are uneven
Tension rod shelves are ideal for small cabinets and narrow spaces. They work well in apartments and rental homes where permanent modifications are not allowed. They are also great for cabinet corners where other shelf types do not fit well.
Expert Insight: When choosing a tension rod, measure the exact width of your cabinet interior. The rod should be slightly longer than the space so it presses firmly against both walls. Too short a rod will not provide enough pressure to stay in place.
Common Mistakes to Avoid When Adding Shelves
Even a simple project can go wrong if you overlook important details. Learning from common mistakes saves you time, money, and frustration. Here are the errors most people make when adding shelves to kitchen cabinets.
Mistake 1: Skipping the Level
Always use a level when marking shelf positions. Uneven shelves look unprofessional and cause items to slide off. A bubble level takes just seconds to use and prevents this problem entirely. Do not rely on visual guesses. Trust your level and your measurements.
Mistake 2: Overloading Thin Shelves
Every shelf has a weight limit. Thin shelves made from flimsy materials will sag over time. Do not overload any single shelf with heavy pots or large appliances. Spread heavy items across lower shelves where the support is strongest. Use thicker boards for shelves that will bear significant weight.
Mistake 3: Choosing the Wrong Shelf Thickness
Thin shelves sag and bend. Use at least 1/2 inch thick boards for standard cabinets. For wider shelves over 24 inches, upgrade to 3/4 inch thick material. The extra thickness makes a noticeable difference in strength and durability. It is a small investment that pays off in the long run.
Mistake 4: Ignoring Cabinet Depth
Measure the depth of your cabinet carefully before cutting any shelves. Shelves that are too deep will not fit properly. Shelves that are too short waste valuable storage space. A snug, accurate fit is what you want every time.
Mistake 5: Forgetting About Tall Item Clearance
Leave enough vertical space between shelves for tall items. If you plan to store cereal boxes, tall jars, or spray bottles, make sure the spacing accommodates them. Measure your tallest items and add a few extra inches of clearance.
Mistake 6: Not Pre-Drilling Pilot Holes
Always drill pilot holes before inserting screws or pins. Skipping this step can cause the wood to split, especially in older or drier cabinets. Pilot holes guide the screws in smoothly and prevent damage. They are a quick step that saves you from costly repairs.
Expert Tips to Maximize Your Kitchen Cabinet Space
Adding shelves is just the beginning. These expert tips help you squeeze every bit of storage from your newly upgraded cabinets. Small changes make a big difference in how organized and functional your kitchen feels.
Tip 1: Use Shelf Risers to Double Your Space
Shelf risers are small platforms that sit on top of an existing shelf. They effectively create two levels of storage in the space of one shelf. Use them for plates, mugs, canned goods, or spices. They are an inexpensive way to dramatically increase your storage capacity.
Tip 2: Add Pull-Out Baskets for Base Cabinets
Pull-out baskets transform hard-to-reach base cabinets into easy-access storage. They slide out smoothly, letting you reach items at the back without moving everything. These baskets work wonders alongside your new shelves for creating a highly organized cabinet system.
Tip 3: Install Shelf Dividers for Neat Organization
Shelf dividers keep items upright and prevent them from shifting around. They are especially useful for cutting boards, baking sheets, and trays. You can buy adjustable dividers or make your own from scrap wood. They keep everything looking tidy and make it easy to find what you need.
Tip 4: Use Clear Bins and Labeled Containers
Clear containers let you see the contents without opening every bin. This saves time and keeps your cabinets looking neat. Label each container with its contents for even better organization. Clear bins also make it easy to spot when you are running low on staples.
Tip 5: Choose Shelf Liners with Grip Texture
Shelf liners with a rubber or textured backing prevent items from sliding around. They are especially useful for shelves that hold glasses and mugs. Grip liners also protect your shelves from water rings and scratches caused by wet items. They are a small upgrade with big benefits.
Tip 6: Optimize Corner Cabinets with Special Inserts
Corner cabinets are often the hardest areas to use effectively. Add a lazy Susan or corner shelf insert to turn dead space into useful storage. These accessories rotate or pull out, giving you access to items that would otherwise be buried. They are a worthwhile addition to any kitchen with corner cabinets.
Tip 7: Go Vertical with Stackable Storage
Stackable bins and containers maximize vertical space on each shelf. They allow you to store more items in the same footprint. Look for stackable options that are the same width as your shelves for a clean, uniform look. This strategy works especially well for snacks, canned goods, and small kitchen gadgets.
Conclusion
Adding extra shelves to kitchen cabinets is one of the best upgrades you can make this year. It is simple, affordable, and delivers immediate results. You do not need to be a skilled handyman or spend a lot of money to get it done right.
Follow the steps in this guide carefully, and you will have new shelves in under an hour. Choose the shelf type that fits your needs and budget. Avoid the common mistakes we highlighted. And use the expert tips to get the most out of every cabinet in your kitchen.
Your kitchen storage will never be the same. The satisfaction of opening your cabinets and seeing everything neatly organized is worth every minute of effort. Start today, and enjoy a more functional, clutter-free kitchen for years to come.
Remember, the key to success is planning. Measure carefully, choose the right materials, and take your time with each step. Once you see the results, you will want to add shelves to every cabinet in your home.
Frequently Asked Questions
What is the best way to add extra shelves to kitchen cabinets?
The best way depends on your cabinet type and storage needs. Adjustable shelves with shelf pins are the most popular because they are easy to install and flexible. For heavy items, fixed shelves with brackets offer the strongest support. For renters, tension rod shelves require no drilling at all.
How much does it cost to add shelves to kitchen cabinets?
The cost is very affordable. Shelf pins cost around five to ten dollars for a pack. Shelf boards made from plywood or MDF run about ten to twenty dollars each. Brackets and liners add another five to fifteen dollars. Most homeowners spend under thirty dollars per cabinet for a complete upgrade.
Can I add shelves to any kitchen cabinet?
Yes, you can add shelves to most cabinet types. The methods work for base cabinets, wall cabinets, tall pantry cabinets, and corner cabinets. The key is measuring your interior dimensions accurately and choosing the right shelf type for the weight and size of items you plan to store.
How do I prevent shelves from sagging over time?
Use shelf boards that are at least 1/2 inch thick for standard cabinets. For wider shelves over 24 inches, choose 3/4 inch thick material. Also, add a center support pin for wider cabinets, and avoid overloading any single shelf with excessively heavy items.
Do I need any special tools to add shelves to kitchen cabinets?
No special tools are needed. A tape measure, pencil, level, drill, and screwdriver are all you require. If you are using shelf brackets, you may also need a stud finder for wall cabinets. Most of these tools are common household items.
How long does it take to add extra shelves to a kitchen cabinet?
The entire process takes about thirty to sixty minutes per cabinet. Measuring and planning takes fifteen minutes. Installing shelf pins or brackets takes another fifteen minutes. Cutting and placing the shelf boards takes the final fifteen to thirty minutes. It is a quick weekend project that delivers lasting results.