Knowing how to treat a kitchen burn quickly can make a huge difference in your recovery time and comfort. This guide covers immediate first aid steps, natural remedies like aloe vera and honey, and practical prevention tips to keep your kitchen safe. Whether you have a minor scald or a more serious burn, you will find clear, actionable advice to help you heal at home.
Every home cook knows the feeling. You are stirring a pot of soup, pulling a hot tray out of the oven, or splashing boiling water while washing dishes, and suddenly, searing pain shoots through your skin. A kitchen burn is one of the most common household injuries, and almost every person has experienced it at least once. The good news is that most minor burns are easy to handle at home with the right approach.
Learning how to treat a kitchen burn properly can save you from unnecessary pain, reduce healing time, and even prevent scarring. Many people reach for random home remedies that do more harm than good. Butter, toothpaste, and ice are just a few of the myths that float around. This guide cuts through the noise and gives you science-backed, natural methods that actually work. You will learn exactly what to do the moment a burn happens, which remedies to reach for, and how to prevent burns in the first place.
Whether you just burned your hand on a hot pan or your child splashed hot water while helping in the kitchen, this article has you covered. Let us walk through everything you need to know about treating a kitchen burn safely and naturally at home.
Key Takeaways
- Cool water is the first and most important step: Running cool water over a burn for 10 to 20 minutes reduces pain and prevents deeper tissue damage.
- Natural remedies work wonders: Aloe vera, honey, and coconut oil can soothe burned skin and speed up the healing process without harsh chemicals.
- Know when to seek medical help: Some burns are too serious for home treatment and need professional care right away.
- Prevention is always better than cure: Simple kitchen safety habits can dramatically reduce your risk of getting burned while cooking.
- Avoid common mistakes: Do not apply butter, ice, or toothpaste to a burn, as these can make things worse and slow healing.
📑 Table of Contents
- Understanding Kitchen Burns: What Happens to Your Skin
- Immediate First Aid Steps for a Kitchen Burn
- Natural Remedies to Treat a Kitchen Burn and Speed Healing
- When to See a Doctor for a Kitchen Burn
- Preventing Kitchen Burns: Simple Habits That Protect Your Skin
- How Long Does a Kitchen Burn Take to Heal?
- Building a Kitchen Burn Care Routine
Understanding Kitchen Burns: What Happens to Your Skin
Before we dive into treatment, it helps to understand what is happening beneath the surface. Burns damage your skin cells, and the severity depends on how deep the injury goes. Most kitchen burns are minor and affect only the outer layer of skin. These are called first-degree burns. They cause redness, pain, and mild swelling but usually heal within a week without scarring.
Second-degree burns go deeper. They cause blistering, intense pain, and more significant swelling. These burns may take two to three weeks to heal and need careful attention to avoid infection. Third-degree burns are rare in a kitchen setting but are a medical emergency. They damage all layers of skin and may look white, charred, or leathery.
Most of the time, when you ask yourself how to treat a kitchen burn, you are dealing with a first-degree or superficial second-degree burn. These are the ones you can confidently manage at home with the right steps and natural remedies. Understanding the burn type helps you choose the best treatment path and know when professional help is necessary.
Common Causes of Kitchen Burns
Kitchen burns happen in many ways. Here are the most common culprits:
- Hot oil splatter from frying or sautéing
- Boiling water or steam from pots and kettles
- Touching hot pot handles or oven racks
- Spilling hot soups or sauces
- Touching a hot baking tray or dish
- Steam escaping from a microwave or pressure cooker
Interestingly, cooking with spicy ingredients like chilli chicken kebabs can also lead to burns when hot oil splashes during the cooking process. Always stay alert when working with high heat and spicy marinades.
Immediate First Aid Steps for a Kitchen Burn
The first few minutes after a burn are critical. Acting quickly can limit the damage and ease your pain significantly. Here is exactly what to do the moment you feel that burn.
Step 1: Cool the Burn with Running Water
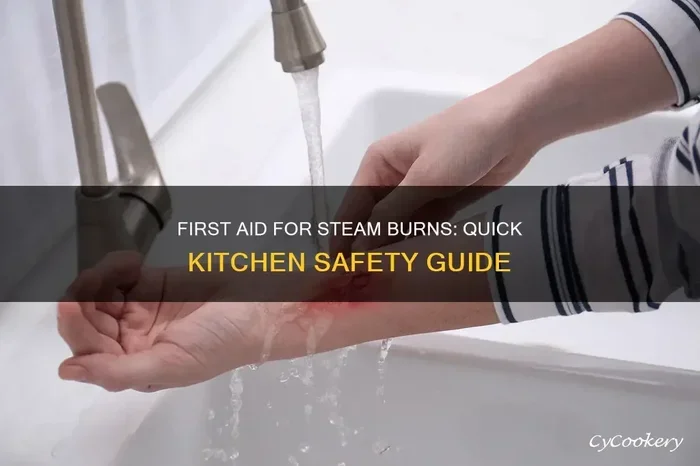
This is the single most important thing you can do. Hold the burned area under cool (not cold) running water for at least 10 to 20 minutes. Cool water helps draw heat away from the skin, reduces swelling, and numbs the pain. Do not use ice or ice water, as extreme cold can cause further tissue damage and make the burn worse.
If the burn is on your hand or arm, simply hold it under the kitchen tap. For a burn on your leg or another area, use a clean cloth soaked in cool water and gently place it over the affected spot, re-wetting it as needed.
Step 2: Remove Tight Items Near the Burn
If the burn is on your hand or finger, gently remove rings, bracelets, or watches before swelling starts. Swelling can make these items difficult to remove later and may restrict blood flow. Do not pull anything off if it is stuck to the burn.
Step 3: Do Not Pop Any Blisters
If blisters form, leave them alone. Blisters are your body’s natural protective barrier. Popping them increases the risk of infection and slows down healing. Let them heal on their own while keeping the area clean and covered.
Step 4: Cover the Burn Gently
After cooling the burn, pat the area dry with a clean, soft cloth. Cover it loosely with a sterile, non-stick bandage or a clean piece of cling wrap. Do not wrap it too tightly. You want the burn to breathe while staying protected from dirt and bacteria.
What NOT to Do After a Kitchen Burn
There are several things people do that can actually harm a burn. Avoid these common mistakes at all costs:
- Do not apply butter, oil, or toothpaste: These trap heat in the skin and can cause infection. Butter does not cool the burn, and toothpaste offers no healing benefit.
- Do not use ice directly on the skin: Ice can cause frostbite and worsen tissue damage.
- Do not use cotton wool or fluffy materials: Fibers can stick to the burn and cause pain when you remove them.
- Do not ignore signs of infection: Increasing redness, pus, fever, or worsening pain means it is time to see a doctor.
Following these simple first aid steps gives your body the best start in healing. Now let us look at natural remedies that can speed up recovery and soothe the discomfort.
Natural Remedies to Treat a Kitchen Burn and Speed Healing
Once you have cooled the burn and covered it, natural remedies can take your recovery to the next level. These ingredients are gentle, effective, and easy to find in your kitchen or medicine cabinet.
Aloe Vera: The Gold Standard for Burn Relief
Aloe vera is hands down one of the best natural treatments for kitchen burns. It has anti-inflammatory properties that reduce redness and swelling. It also promotes new skin cell growth, which speeds up healing. Fresh aloe vera gel straight from the plant is ideal, but pure aloe vera gel from a bottle works well too.
To use aloe vera, simply apply a thin layer to the cooled burn three to four times a day. The gel forms a protective layer that keeps the area moist and comfortable. Many people notice less pain and faster healing within just a few days of regular use. Aloe vera is one of the safest and most studied natural remedies for skin injuries.
Honey: Nature’s Healing Powerhouse
Raw honey has been used for centuries as a natural wound healer. It has antibacterial properties that help prevent infection and creates a moist environment that promotes healing. Manuka honey is especially effective, but any pure raw honey will do.
Apply a thin layer of honey directly to the burn and cover it with a clean bandage. Change the dressing once or twice a day, reapplying fresh honey each time. Honey not only soothes pain but also helps minimize scarring. It is one of the most underrated remedies for how to treat a kitchen burn naturally.
Coconut Oil for Soothing and Moisturizing
Once the initial heat has subsided and the burn has started to heal, coconut oil can help. It is rich in fatty acids that moisturize damaged skin and reduce itching as the burn heals. Apply a small amount of virgin coconut oil to the affected area twice a day. It keeps the skin soft and flexible, which reduces the chance of tight, uncomfortable healing skin.
Lavender Essential Oil for Pain Relief
Lavender essential oil is known for its calming and healing properties. Dilute a few drops with a carrier oil like coconut oil or jojoba oil and apply gently to the burn. Lavender oil can help reduce pain, inflammation, and the urge to scratch healing skin. Always dilute essential oils before applying them to the skin, as they are very potent.
Green Tea Bags for Cooling Relief
Used green tea bags, cooled in the refrigerator, can provide gentle relief for minor burns. Green tea contains antioxidants that support skin repair. Simply place a cooled tea bag on the burn for 10 to 15 minutes. This is especially helpful for burns on the face or other sensitive areas.
These natural remedies work best when combined with proper first aid. Cool the burn first, then apply your chosen remedy regularly for the best results.
When to See a Doctor for a Kitchen Burn
Most kitchen burns are minor and heal well at home. However, some situations require professional medical attention. Knowing the difference can prevent complications and keep you safe.
You should see a doctor if any of the following apply:
- The burn is larger than three inches across
- The burn is on your face, hands, feet, groin, or over a joint
- The burn looks white, charred, or leathery
- You see signs of infection, such as increasing redness, swelling, or pus
- The pain does not improve after 48 hours of home treatment
- The burn was caused by chemicals or electricity
- You have a child under five or an elderly person with a burn
Do not hesitate to seek medical help if you are unsure. It is always better to be safe than sorry. A doctor can assess the severity, provide proper wound care, and prescribe treatment if needed. Trust your instincts. If something feels wrong, get it checked out.
Preventing Kitchen Burns: Simple Habits That Protect Your Skin
The best way to treat a kitchen burn is to avoid getting one in the first place. Prevention is simple and comes down to building a few smart habits in the kitchen. Here are practical tips that make a real difference.
Use Oven Mitts and Pot Holders Every Time
Never grab a hot pot or tray with bare hands, even if you think it is just warm. Always use thick, dry oven mitts or pot holders. Wet cloths conduct heat quickly and can cause burns even from warm surfaces. Keep your mitts near the oven and stove so you always have them within reach.
Turn Pot Handles Inward
This is one of the simplest and most effective kitchen safety habits. Turn all pot handles toward the back of the stove so they cannot be bumped or grabbed by children. A pot of boiling water or hot oil can cause a serious burn in seconds if it is knocked over.
Be Careful with Hot Oil
Hot oil splatter is one of the leading causes of kitchen burns. When frying, use a splatter guard and never leave hot oil unattended. If you are cooking with spicy marinades, like those used for chilli chicken kebabs, be extra cautious because the oil can splatter more aggressively when it hits the marinade ingredients.
Keep Children and Pets Away from the Stove
Establish a safety zone around the stove. Teach children that the kitchen is not a play area when hot food and liquids are involved. Keep young children out of the kitchen during active cooking, especially when frying or boiling.
Test Food Temperature Before Serving
Always test the temperature of food and liquids before eating or serving. Blow on hot soups and stir them to release steam. Use a spoon to test the heat before taking a bite. These small habits can prevent painful burns.
Keep a First Aid Kit in the Kitchen
Having a basic first aid kit within arm’s reach of the kitchen is a smart move. Include sterile bandages, antibiotic ointment, clean cloths, and a small bottle of aloe vera gel. When a burn happens, you want to act immediately without searching for supplies.
Building these habits takes just a few weeks of consistent practice. Once they become second nature, you will cook with more confidence and far less risk of injury.
How Long Does a Kitchen Burn Take to Heal?
Healing time depends on the severity of the burn. First-degree burns typically heal within 5 to 10 days with proper care. The skin may peel as it heals, which is completely normal. Second-degree burns usually take two to three weeks to heal, especially if you keep the area moist with natural remedies like aloe vera or honey.
During the healing process, protect the burn from the sun. UV exposure can darken the skin and make scars more noticeable. If you need to go outside, cover the burn with a loose bandage or clothing. Staying hydrated and eating foods rich in vitamins C and E can also support skin repair from the inside out.
Patience is key. Your skin is doing incredible work to heal itself, and giving it the right care and time makes all the difference. Avoid picking at peeling skin or scabs, as this can lead to scarring and infection.
Building a Kitchen Burn Care Routine
Once you have treated a burn, establishing a simple daily care routine helps ensure smooth healing. Here is an easy routine you can follow:
- Morning: Gently clean the burn with cool water and mild soap. Apply a thin layer of aloe vera or honey. Cover with a clean bandage.
- Midday: Reapply your chosen natural remedy if the area feels dry or painful. Keep the burn protected.
- Evening: Clean the burn again gently. Apply a fresh layer of remedy and a new bandage. Let the burn breathe for a few hours before bed if possible.
- Ongoing: Monitor for signs of infection every day. Watch for increased redness, warmth, swelling, or unusual discharge.
Sticking to this routine gives your skin the best environment to heal quickly and cleanly. Consistency matters more than any single remedy.
Learning how to treat a kitchen burn is a skill every home cook should have. With the right first aid, natural remedies, and prevention habits, you can heal quickly and get back to enjoying your time in the kitchen. Most burns are minor and respond well to simple home care. The key is to act fast, avoid common myths, and give your skin the support it needs to recover.
Remember to keep aloe vera, raw honey, and coconut oil stocked in your kitchen. These natural allies are your best friends when it comes to soothing burned skin and promoting healing. And above all, practice safe cooking habits every day to keep burns from happening in the first place. Your kitchen should be a place of joy and creativity, not a source of pain. Stay safe, stay prepared, and happy cooking.
Frequently Asked Questions
What is the fastest way to treat a kitchen burn at home?
The fastest way is to run cool water over the burn for 10 to 20 minutes immediately after the injury. Then apply pure aloe vera gel or raw honey to soothe the skin and promote healing. Avoid butter, ice, or toothpaste, as these can worsen the burn.
Can you put honey on a kitchen burn?
Yes, raw honey is an excellent natural remedy for kitchen burns. It has antibacterial properties that prevent infection and creates a moist environment that speeds up healing. Apply a thin layer of honey and cover with a clean bandage.
How long does a minor kitchen burn take to heal?
A minor first-degree kitchen burn usually heals within 5 to 10 days with proper care. Second-degree burns may take two to three weeks. Keeping the burn moisturized with aloe vera or coconut oil can help speed up the process.
Should you put ice on a kitchen burn?
No, you should never put ice directly on a burn. Ice can cause frostbite and damage the already injured tissue. Cool running water is the safest and most effective way to treat a burn in the first few minutes.
When should I see a doctor for a kitchen burn?
See a doctor if the burn is larger than three inches, appears white or charred, is on your face or hands, shows signs of infection, or does not improve after two days of home treatment. Children and elderly adults should always be evaluated by a professional for any burn.
How can I prevent kitchen burns while cooking?
Use oven mitts, turn pot handles inward, be careful with hot oil, keep children away from the stove, and always test food temperature before serving. Keeping a first aid kit in the kitchen also ensures you are ready to act immediately if a burn occurs.
=== CONCLUSION ===
Knowing how to treat a kitchen burn fast and naturally at home is one of the most valuable skills you can have. With the right first aid, simple natural remedies, and smart prevention habits, you can heal quickly and safely. Your kitchen should always be a place of creativity and joy, and being prepared for minor accidents makes that possible every single day.