I have always loved pickles. Like, big-time love. So much that my uncle used to call me “Nickel Pickle” when I was a kid. So the moment I saw this viral pickle sandwich trend, I ran to try it and let me tell you, it totally lived up to the hype!
This sandwich swaps the bread for crispy, cheesy pickles. It’s not a full-on bread replacement (I still love my carbs), but it’s tangy, crunchy, and perfect for anyone watching carbs or just looking for something new. Plus, it’s a fun way to play with flavors and fillings. You can customize it however you like!
Method
Step 1: Prep the Pickles
Start by preheating your oven to 400°F. While that’s heating up, take your dill pickle sandwich slices and press them gently between two paper towels. This step may seem small, but it’s super important removing as much moisture as possible helps the cheese crisp up properly in the oven. If the pickles are too wet, the cheese will steam instead of getting that golden, crunchy texture we want.
Step 2: Set Up the Cheese Layers
Next, grab a sheet pan and line it with parchment paper to prevent sticking. Sprinkle half of your shredded cheese into two small, even piles directly on the parchment paper. Think of these like little cheesy “beds” that will become the top and bottom of your sandwich. Once the base layers are down, place four pickle slices on each cheese mound in a neat layer. Then, sprinkle the rest of the cheese evenly over the tops of the pickles. You now have two cheesy-pickle stacks that are ready to go in the oven.
Step 3: Bake and Cool
Place your pan in the oven and bake for 20 minutes, or until the cheese is golden brown and crispy around the edges. When the time is up, remove the tray from the oven but don’t touch it just yet! Let the cheese sit and cool for about 5–6 minutes on the pan. This cooling time helps the cheese firm up so it holds together when you build your sandwich. Moving it too soon can cause everything to fall apart, so patience here really pays off.
Step 4: Add Fillings and Build Your Sandwich
Once the cheesy rounds have cooled and set, use a spatula to carefully lift them off the tray. Now it’s time to build! Lay one round down on your plate and start adding your favorite fillings. I love using romaine lettuce, turkey slices, a spoonful of pesto, and some pickled onions for a mix of fresh, savory, and tangy flavors. Top it all off with the second cheese-pickle round to create your sandwich. Then take a big, crunchy bite and enjoy.
Necessary Tools
- Sheet pan
- Parchment paper
- Oven
- Paper towels
- Spatula
- Knife (if slicing fillings)
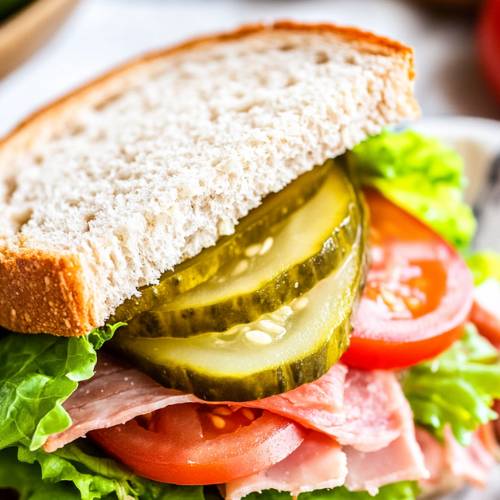
Viral Pickle Sandwich (Crunchy, Cheesy & Totally Addicting!)
Cuisine: AmericanDifficulty: Easy2
servings10
minutes20
minutes30
minutesIngredients
8 dill pickle sandwich slices
3/4 cup shredded cheese (I used Italian herb mozzarella, but use what you like!)
Optional Fillings:
Romaine lettuce
Turkey slices
Pesto
Pickled onions
Directions
- Prep the Pickles
First, preheat your oven to 400°F. While that’s warming up, grab your dill pickle slices and press them between two paper towels. This step is super important it helps soak up extra moisture so the cheese can get crispy. - Set Up the Cheese Layers
On a parchment-lined sheet pan, sprinkle half of your shredded cheese into two even piles (like little cheesy beds). These will act as the “bread.” Place four pickle slices on top of each cheesy mound. Then, sprinkle the rest of the cheese right on top of the pickles. You now have a cheesy-pickle-cheesy sandwich setup ready to bake! - Bake and Cool
Slide the tray into the oven and bake for 20 minutes, or until the cheese is golden and crispy. When you take it out, don’t touch it right away. Let it sit for 5–6 minutes so the cheese hardens as it cools. This helps everything hold together better. - Add Fillings and Build
Once cool, gently lift each cheese-pickle round off the pan using a spatula. Add whatever fillings you like lettuce, turkey, pesto, pickled onions you name it. Sandwich them together and enjoy that first bite. It’s crunchy, melty, tangy goodness!
Notes
- Make sure you press out all the extra liquid from the pickles too much moisture will make the cheese soggy instead of crispy.
- Don’t skip the cooling step after baking! If you try to move the cheese-pickle rounds too soon, they’ll fall apart.
- Use parchment paper or a non-stick baking mat to keep the cheese from sticking to the pan.
Serving Suggestions
- Serve with crunchy veggie sticks or a small green salad
- Try dipping it in ranch, spicy mayo, or mustard
- Makes a fun lunch or low-carb snack
- Cut it in halves or quarters for party bites or kid lunches
Fun Fact
Did you know that cheese crisps up better when the moisture is low? That’s why drying the pickles before baking is a game-changer! It helps you get that amazing crunch.
Conclusion
This pickle sandwich might be a viral trend, but it’s totally worth the hype. It’s crunchy, cheesy, zesty, and easy to make with whatever fillings you have on hand. Whether you’re a pickle lover like me or just want to try something different, this recipe is fun, fast, and super satisfying. Try it once, and you’ll be hooked!